Containers and Kubernetes are used to build, ship, and run cloud-native applications, which can be a complex process. High-level steps performed by a developer on their machine include packaging the app into a container image, pushing and pulling images to and from the container registry, working with YAML files to define Kubernetes resources, deploying resources using kubectl, and testing and troubleshooting applications
There are multiple ways to perform these steps. Some of the well-known tools in this space include Docker Desktop, Minikube, Lens Desktop, Rancher Desktop, Podman, k3s, k0s, and VSCode. In this article, I’ll talk about these tools and why and how they are used by developers to build, ship, and run applications. Further, I’ll dive into the Lens Desktop Kube feature in Lens 6, which enables developers to consolidate many of these tools down to one, and reduce the complexity of cloud-native development.
Cloud Native Development Tools
Let’s start by taking a brief look at some of the tools available to developers.
Docker Desktop enables you to package code into a container image and distribute it, using either a GUI or the command line. A few alternatives are Podman, Buildah, and OCIBuilder.
Minikube is a tool that lets you run Kubernetes locally, providing a quick and easy way to deploy, test, and troubleshoot apps. A few alternatives are Docker Desktop (which includes a standalone Kubernetes server), Rancher Desktop, k3s, and k0s.
Visual Studio Code is a code editor redefined and optimized for building and debugging modern web and cloud applications. This helps to write syntax-free YAML files.
Lens — A Kubernetes IDE that helps you visualize and control your Kubernetes clusters, minimizing the need to use the kubectl CLI. A few alternatives are k9s, kube-dashboard, Octant, and kubenav.
Your favorite terminal to run commands.
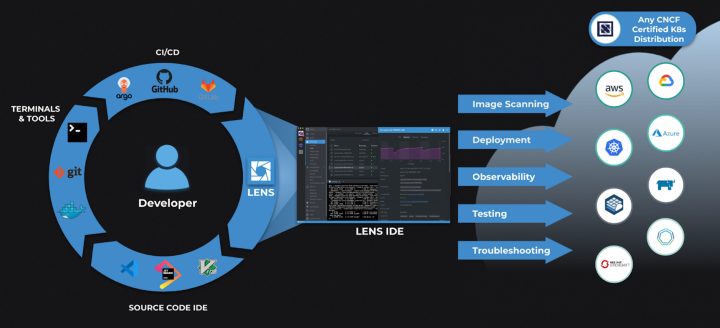
Avoiding the context-switching problem
Context switching between these tools increases complexity, consumes time, and reduces productivity. What’s more, adding all these tools on our system can eat a large amount of system resources.
We had similar challenges with Kubernetes, where it was very difficult to deal with several objects and commands using kubectl by providing different flags. Not-so-friendly output formats can limit insight into the cluster you are working with.
We found that we were spending more time trying to use Kubernetes efficiently than we were on building our applications. Finally, the team behind the Lens platform identified this challenge and provided us with solutions.
And obviously, we weren’t the only ones facing these problems, because today, over 750,000 users rely on Lens to interact with Kubernetes clusters.
To make things even easier, Lens 6 introduced the Lens Desktop Kubernetes (LDK) feature, which provides you with your own personal Kubernetes cluster and Docker runtime — all built into Lens, providing full insight into the cluster and eliminating the need to install, for example…
- Docker Desktop to build and ship images
- Minikube to run a local Kubernetes cluster
Before we go into detail to configure and use LDK, here are a few resources to get started with Lens:
Got it? OK, moving on ![]()
Lens Desktop Kubernetes (LDK)
Lens Desktop Kubernetes provides you with your own personal Kubernetes cluster. Whether you are just getting started or are a seasoned cloud-native developer, with a single click you can start a Kubernetes cluster. There is no installation. You can configure the Kube version, CPU, memory, and disk size for your cluster to make Lens Kubernetes as small or large as you need to develop and test your workloads.
To use Lens Desktop Kubernetes:
- Open Lens
- Click Lens Desktop Kube in the lower-right corner and click Settings
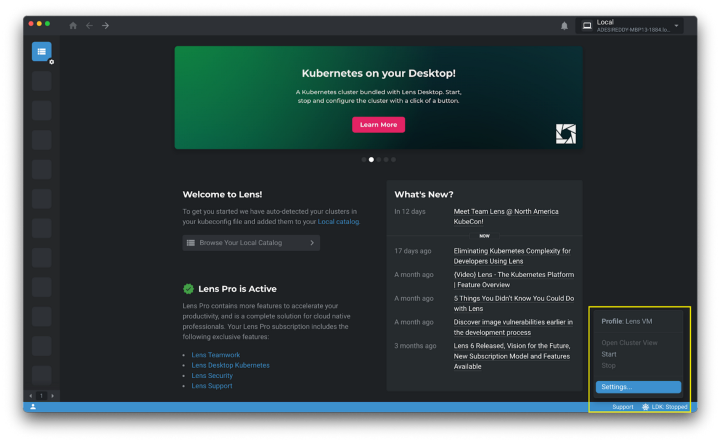
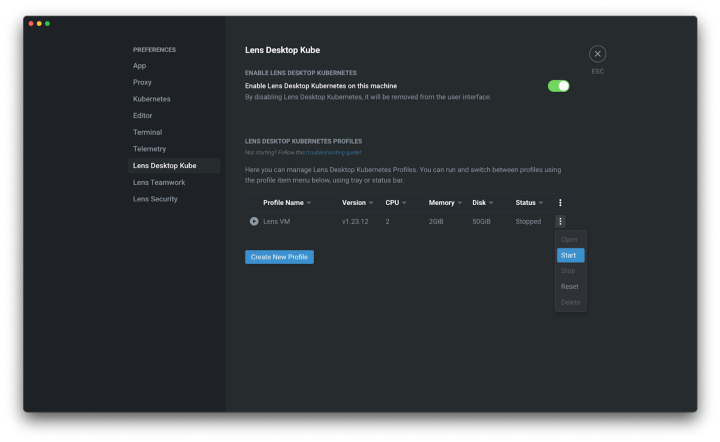
- You’ll land on the Lens Desktop Kube Preference page. Here you can create a new profile, by choosing Kubernetes Version, CPU, Memory, and Disk space, or use the Default profile to get started.
-
Now click on Start to start the Lens VM and let the cluster bootstrap. The status changes from Stopped → Starting → Running. Note: It might take a few minutes to start the instance.
-
Close the preferences page and select Open Cluster View in the lower right corner.

Hurray! You are now connected to your local dev Kubernetes cluster.
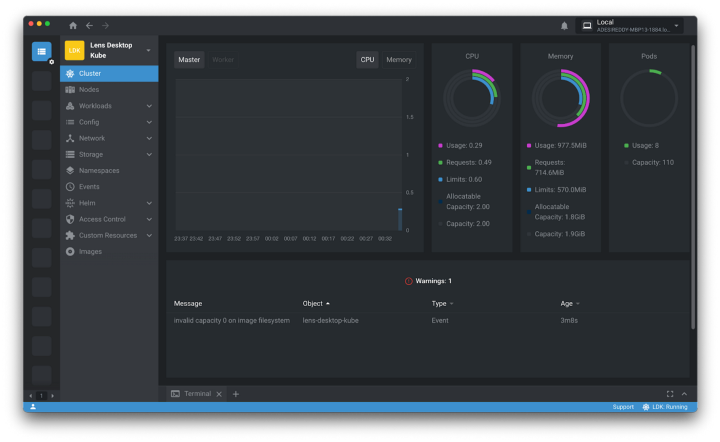
Navigate around to explore cluster configurations and default Kubernetes resources.
Note that you must perform two critical steps locally before deploying applications on this cluster:
- Build a Docker image using a Dockerfile and push it to a registry
- Write a YAML file defining Kubernetes resources
Building container images
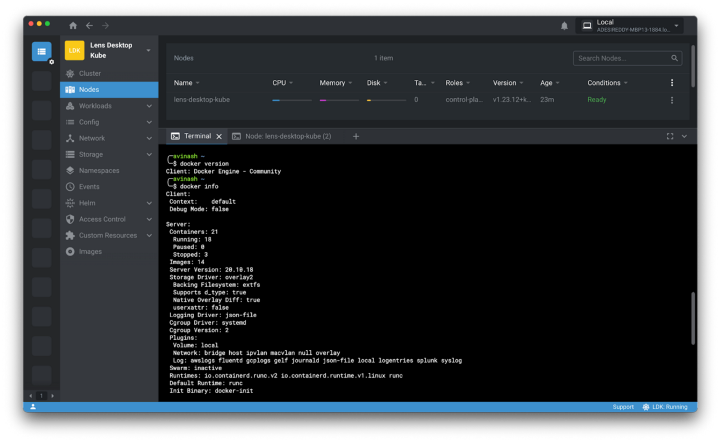
The Lens VM uses Docker Engine (Community Edition) as a runtime, and the Docker CLI context is pre-configured to use this in the terminal. Open the terminal from Lens and you can run any Docker command including “docker build” and “docker push”.
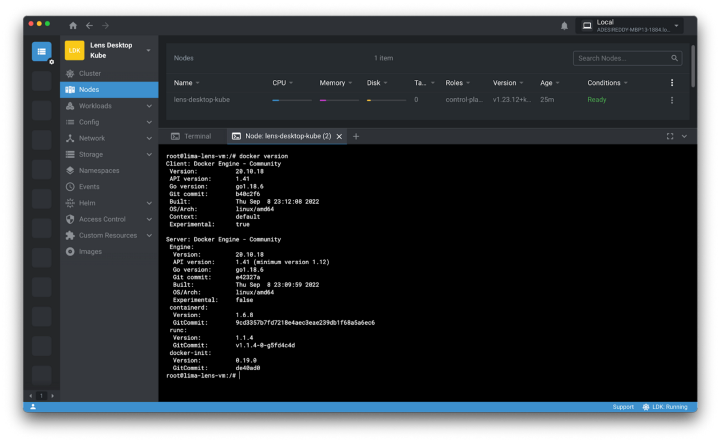
Another option is to access the Lens VM’s node shell to jump into the VM and perform operations in the VM.
Write a YAML file to define a Kubernetes resource
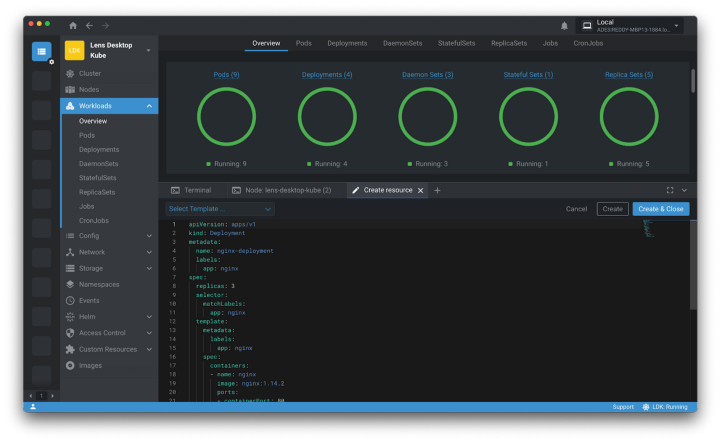
There are several VS Code extensions to generate Kubernetes resource objects. However, you can create or edit Kubernetes resource objects within Lens, eliminating the need to switch to VS Code.
This text was written by Avinash Desireddy for our blog!